
Happy Niu Year!
Happy Niu Year!
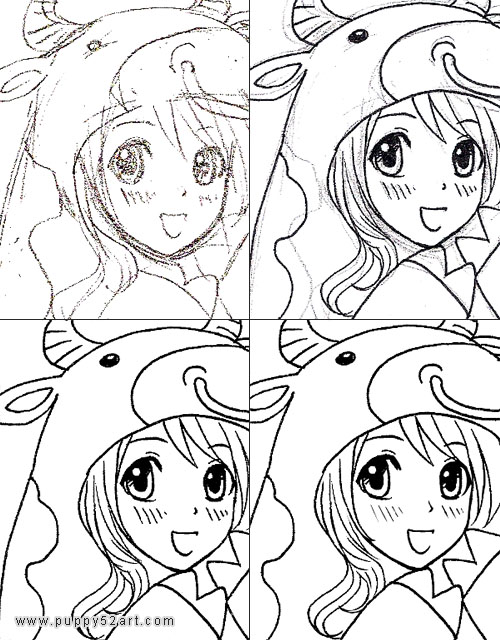
Sorry a little late as the festivities usually = busy time ^^; Anyways if you don’t know already, the chinese new year usually means we’re supposed to celebrate 15 days by visiting relatives and such. Married folks will give unmarried folks (kids usually) red-packets etc etc… ^^; To see the full image, just click on image below, I will update it into the gallery later ^^/

I had already coloured the Mirai image in the last couple of entries, it would be a little strange to go backwards to demonstrate colouring. So I will use this Niu Year image above to roughly demonstrate how I colour a quick CG :)
Please take note tho, this is only one of the many many ways we can colour using the computer, and it is not a set in stone method, and I may be going a little too fast as well, so please bear with me ^^;/
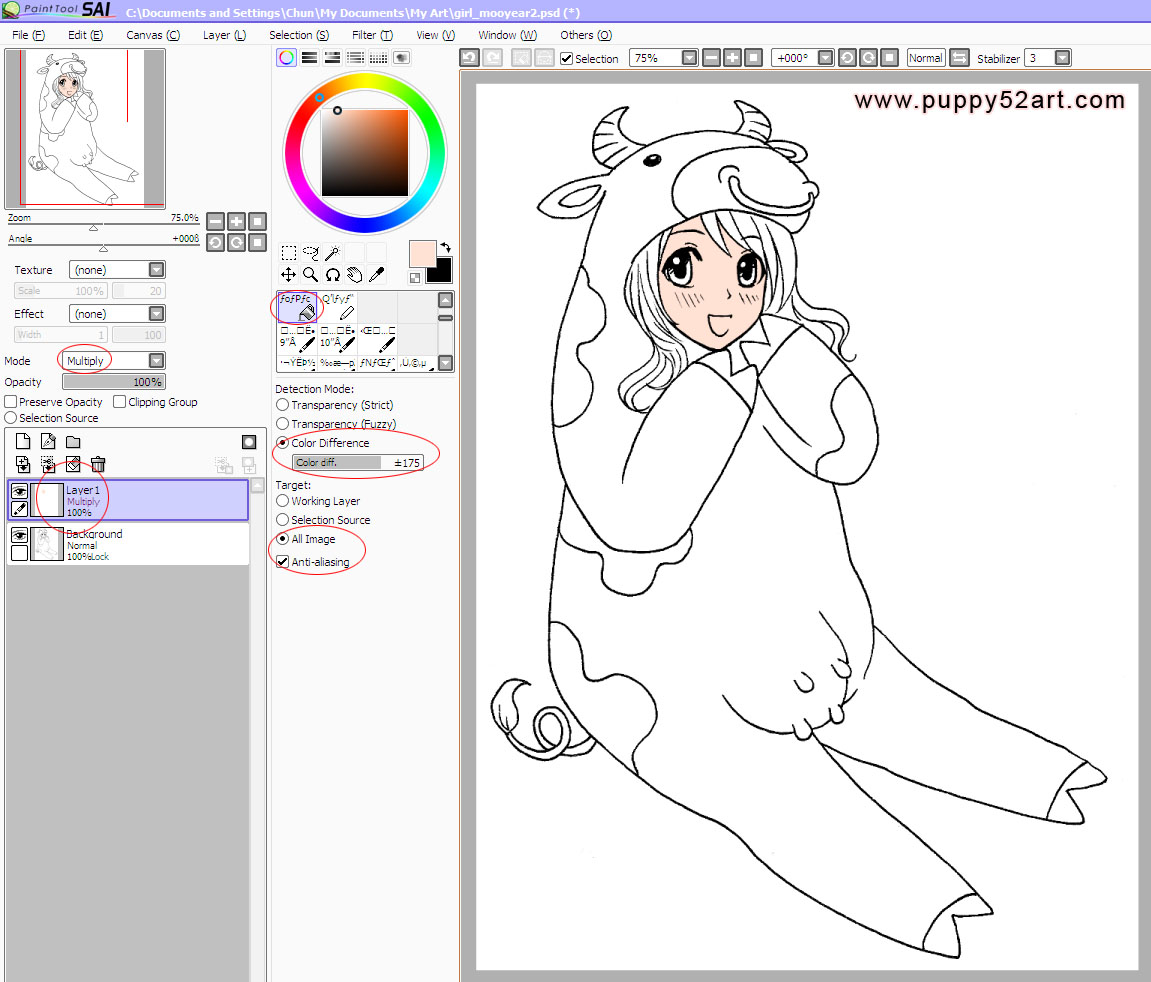
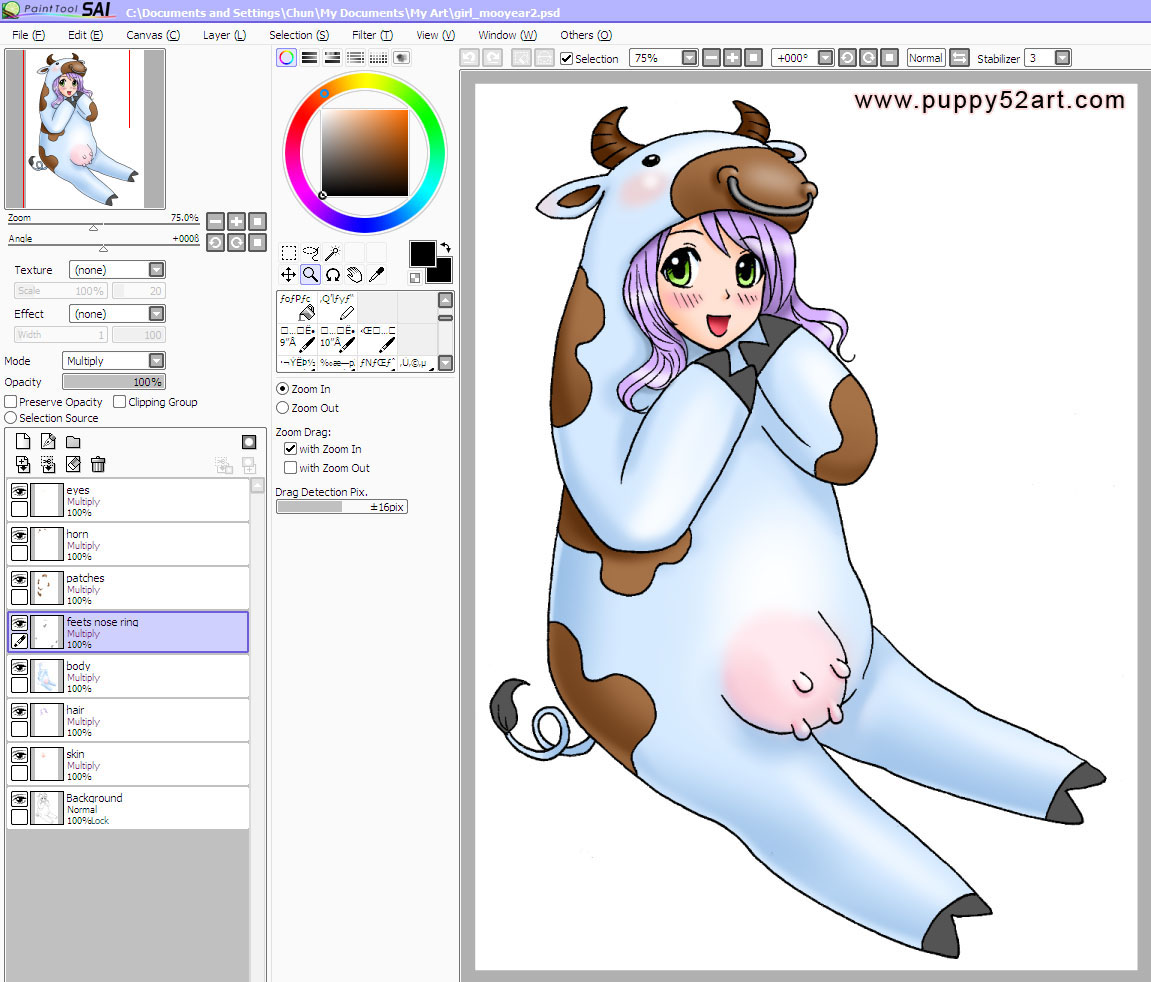
So after the From sketch to ink process, I power up Sai (What is Sai?), open the cleaned up file and make a new layer over the Background layer, change that New layer from Normal to Multiply (please see the screen capture in full size for the circled items). Doing this, the colour will be somewhat transparent, showing the inked line art below.
I can rename the layer to Skin (or whatever that layer is being coloured for, eyes, body etcetc). The “Colour Difference” option you should play around with it — in my opinion, it is similar to “Tolerance” in Photoshop.
* Take note: a lot of the steps are quite similar in Photoshop actually, just maybe different names and locations, for example “Sample All Layers” in Photosho is similar “All Image” in Sai. That option tells the program to refer to the whole image (including the outline) when you make a selection (with Wand tool) or filling (With Bucket tool).
Please click on the image to see the full size screencapture
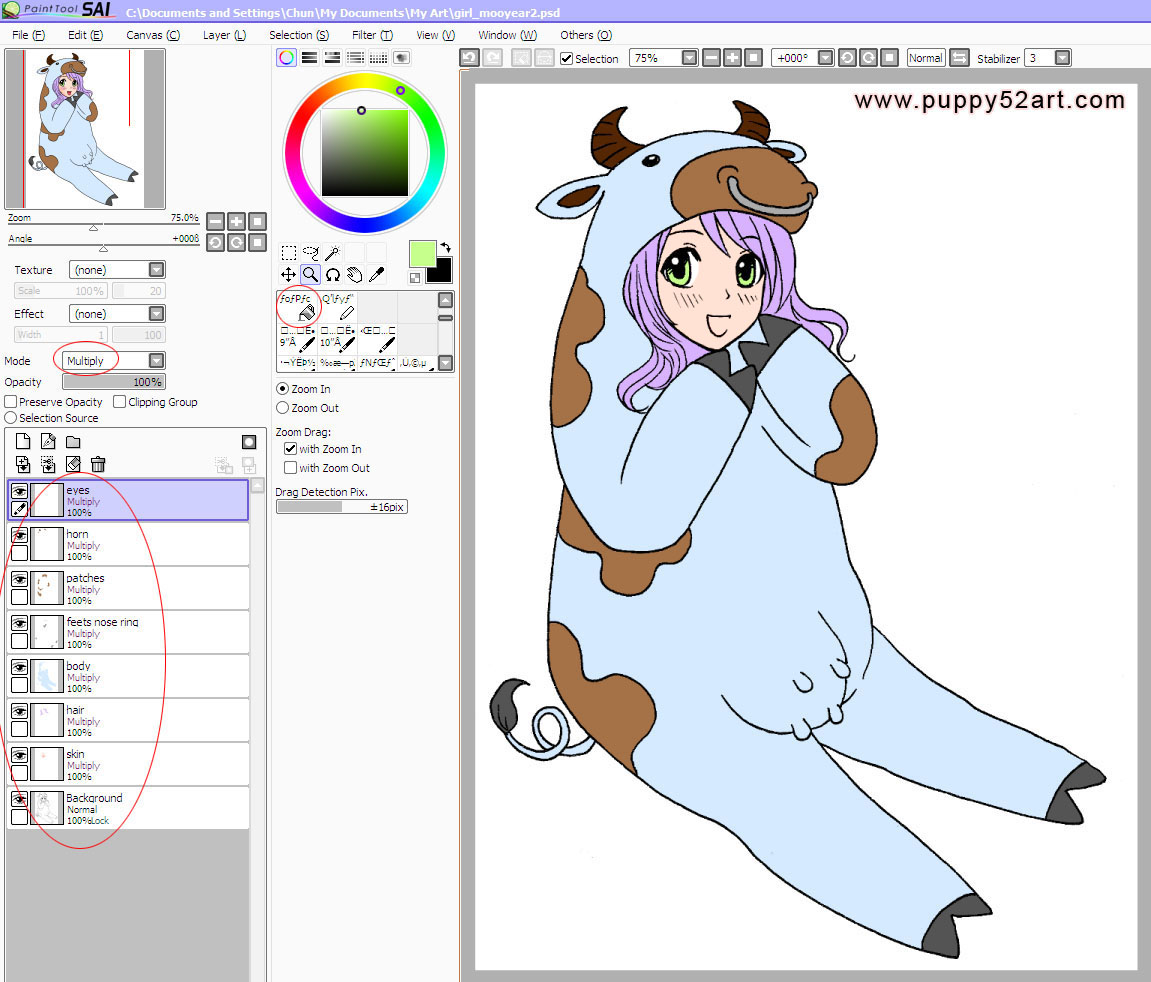
As seen from below, I make each layer for items in similar colours and fill with the bucket tool. The next stage is to make sure some of the corners and such are filled by zooming in to check, and colouring any uncoloured area with the brush tools.
Next, I start shading each of the layers, but before I do that, I need to hold down “control” key, and click (using the mouse) on the layer I want to shade, doing so selects the layer I had filled with the base colour. For this example, the blue part in the artwork below (see the full size image to view in detail, the selected layer will have a dotted line around it). Now when you shade in highlights and shadow with the brush tools, your colours will not bleed outside of the selection.
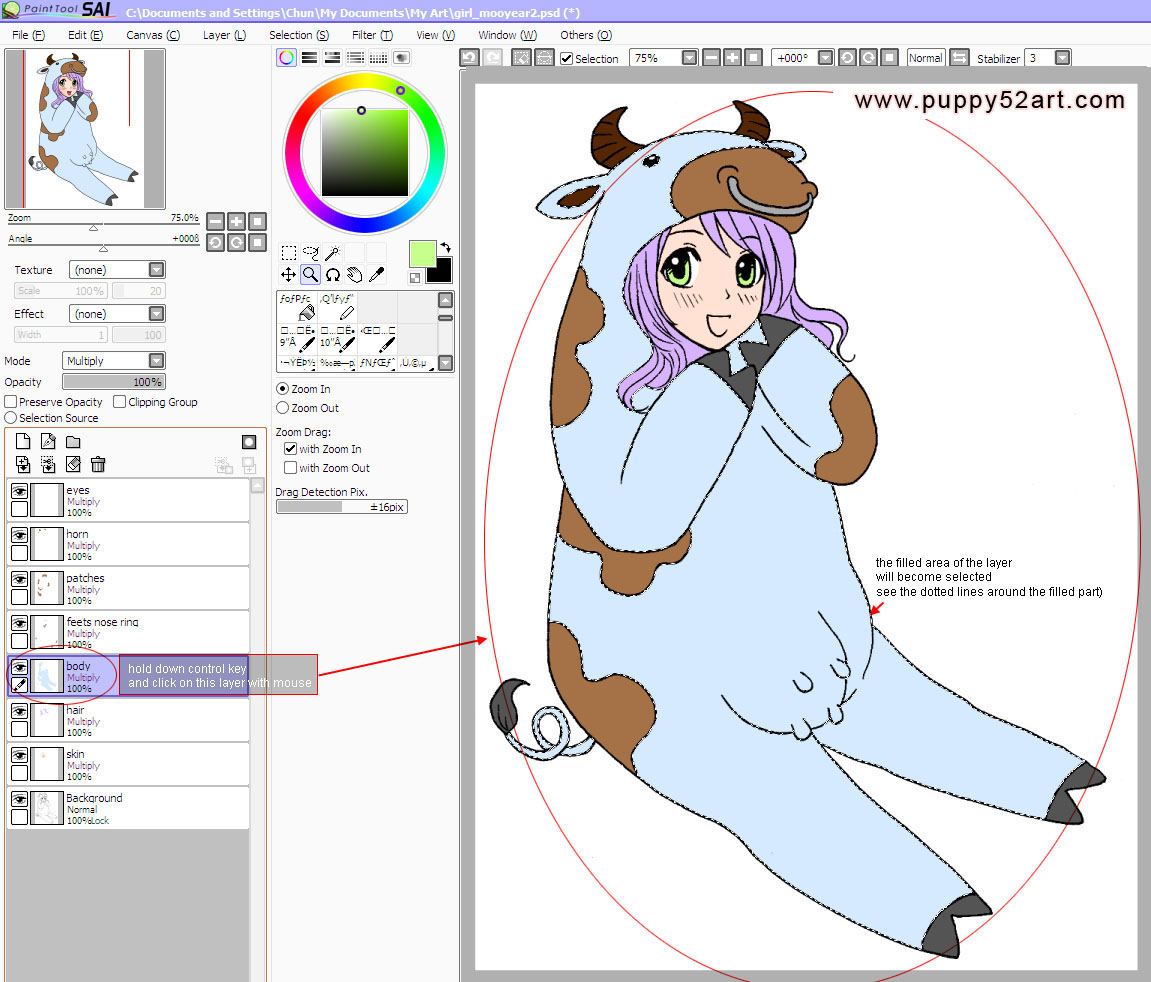
So this is what it looks like after I shade in each of the layers :) In order to use the fill tool efficiently, the line art is best all connected (usually done around the clean up stage). If the image is not closed/properly connected, you’ll see that when I fill the colours some colours are in the wrong places — the purple colour of the hair went under the neck area of the girl (see image before this one). I fixed the colour during the shading stage.
The background is quickly done in Photoshop. So maybe next time :3


Nice behind the scenes stuff ^^ I should practice this sort of method on photoshop, but I really don’t have much drawing skill at all. Happy Niu Year to you!
Thanks Persocom! ^^ HAppy Niu Year!
lol, the udder reminds me of cow and chicken. (‘~’)
happy new year so do i get an ang pow? ^^;
Ohh cuute! Reminds me of my dog because she’s pregnant and her “udders” are huge like a cow’s! O.o
Anyway, Happy Chinese New Year! :’D
hmm seeing udders on a girl wearing a cow costume is kinda weird! lol
anyway happy moo year!
gordon LOL I remember that cartoon! :P how about a cookie? LOL
Mimi awwww so I guess U guys found her a mate lol! And eep!
Happy Chinese New Year! :D
Happy New Year chun! Though I already greeted you on the first day in MSN lol. A nice cowgirl. :)
Panther haha sorry, was away from comp then :P U like udders? lol
And Suneo (sorry I keep missing some comments here and there ^^;) and LOL Happy Moo Year to U too!
Oh no, her udders are showing! ^^;
Why do u use sai since u have photoshop too?
@Neutrinos LOL and good question! I personally find Sai a lighter and more efficient program to use for inking and colouring on the computer with a tablet.
The best part is you can save the end prouduct in *. psd format.
Rather than saying I only use Sai, maybe I should say I use both, since I do use photoshop for text and other effects.
I tried to ink in photoshop before but encountered problems like the pen pressure not being recognized if the file is huge, and generally I felt also that the lines are not clean or sharp enough. Hope this answers your question!
Great art Chun, sorry to say this but I do not think you should draw the milk come out place so pop out, is a little odd to me (^_^)!
Happy Chinese New Year!!!!!!!!
k LOL actually if U do a google on Udder…. there’s a lot way bigger and more pop out than hers ^^; Some even have patch around :P
Otaku Dan Happy Chinese New Year!!! :D:D
mooo! happy new year Chun. nice tutorial. ^^
Mooooooorvin lol Happy Moo Year! :D
You used fewer layers than I thought you would. But I’ve never used SAI before so I dunno if that’s the norm. (I always end up with a million layers in photoshop xD)
Coco well if I have a lot of layers the file will be huge ^^;, and in photoshop the whole file slows down if it’s 300 dpi or higher ^^; so I stick to having the same or similar colours in the same layers, or certain objects in same layers ^^. Even if I use photoshop I’ll be doing it the same way (as little layers as possible) ^^.